 |
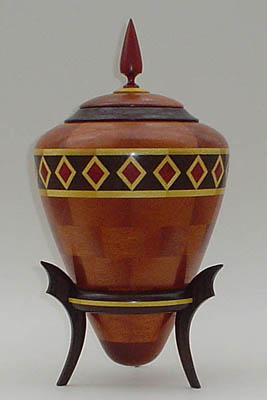
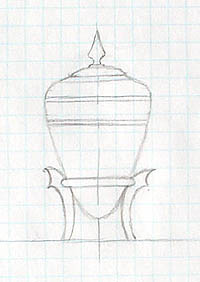
Here's the design I came up with for my next project. It'll be an urn with a stand that will be about 6 inches diameter and about 12 inches tall including the stand and finial. |
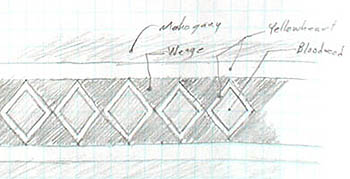 |
Here is the pattern I plan to use for the feature ring. This is a lot different from other patterns that I've tried. It'll be tough; but hopefully, I can accomplish this, if not it'll just be a minor design change. |
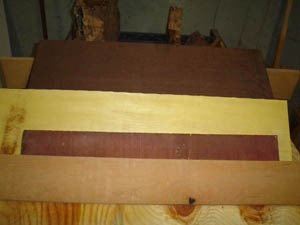 |
And, I have picked out the woods that I plan to use for the project. The dark wood at the top is wenge, next is yelloheart, then bloodwood, and at the bottom is mahogany. |
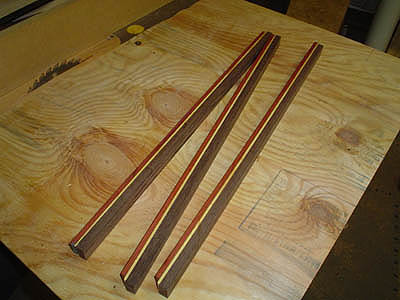 |
Here I have cut strips of wenge, yellowheart and bloodwood and laminated them together. |
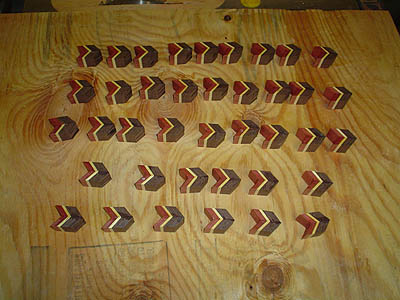 |
Here I have cut the laminations and reglued them into sub-assemblies. |
 |
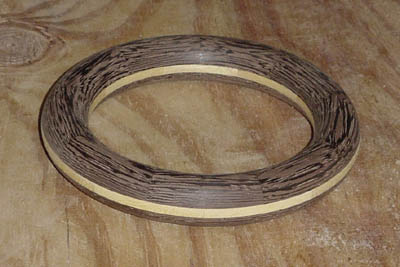
I squared the segments and cut a miter on one side of each one. I paired up each half and formed a ring. I then glued it all together. |
 |
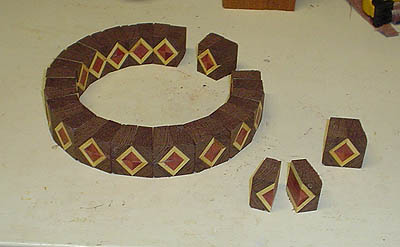
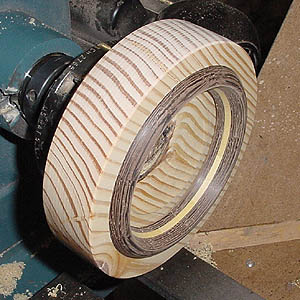
Here are the other simpler rings glued and clamped with rubber bands waiting for the glue to dry. |
 |
I have started gluing the rings together to form the vessel. |
 |
Here I have finished gluing up the two parts of the
vessel. There are two parts because I plan to turn the
two pieces separately, and then glue them together later.
This makes it much easier to turn the inside. Here is a
picture of the two parts. Notice there is a scrap block glued to the bottom of the larger section. It'll be used to hold the section when it is reversed on the lathe. |
 |
I started turning the bottom portion. Here is a picture of it on the lathe after I have turned the general outside shape. |
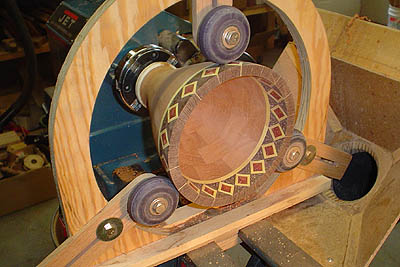 |
This is after I reversed the piece on the lathe and
hollowed the inside. The inside is complete and sanded,
but I will take another 1/8 inch or so off of the outside
after I join the two sections later. |
 |
Here is a picture of the top portion turned. The
inside is complete and the outside is close. I'll finish
up the outside after I get the two sections together. |
 |
Here the two sections are being glued together. The
tailstock of the lathe is acting as the clamp. I'll have
to wait until tomorrow to finish turning it to give the
glue plenty of time to cure. |
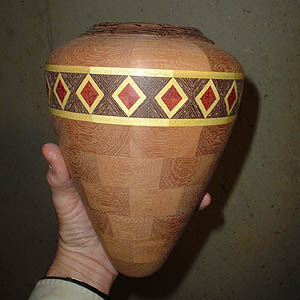 |
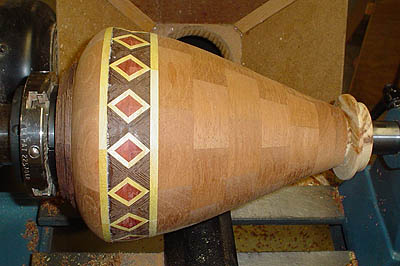
Here is the urn with all the shaping and sanding
completed. Well, since this vessel doesn't have a base I'll have to proceed to construct the stand. I'll also start on the lid. |
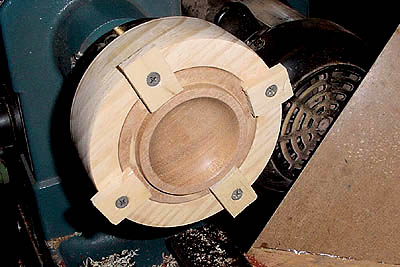 |
This is a picture showing how I held the lid while turningthe inside. Its a type of jam chuck with cleats to secure the piece. |
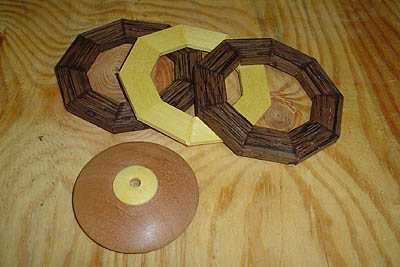 |
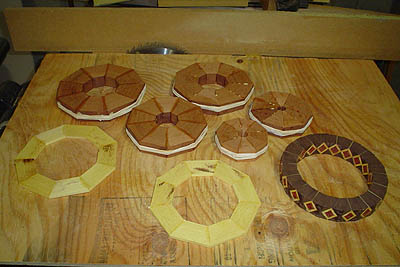
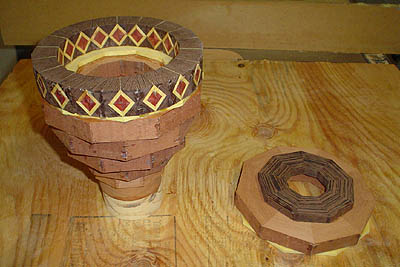
Here are the rings for the stand. The lid is done except for the finial. |
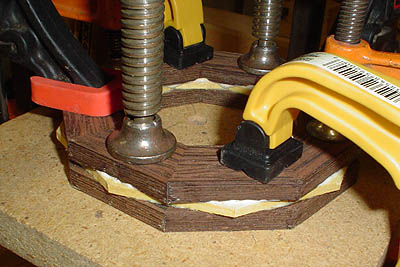 |
Gluing the rings together for the stand. |
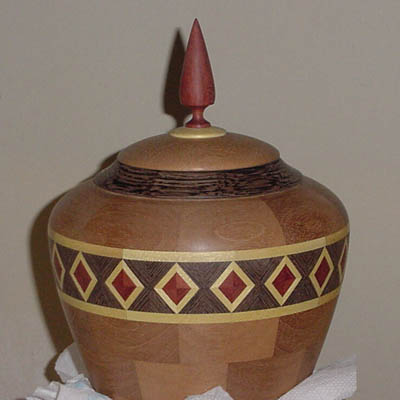 |
Here is a picture with the finial completed. |
 |
Here is the ring for the stand nearly complete. |
 |
This is the method I used to hold the ring for turning. Here I have shaped the inside of the ring to fit the vessel snuggly. |
 |
Here is the completed stand. |