|
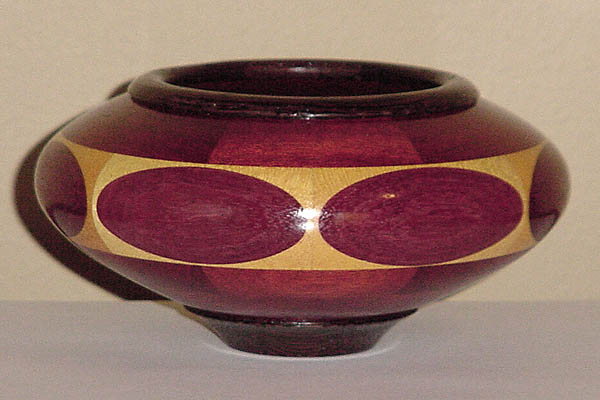
Design Here is the plan. Hopefully, it'll turn out pretty close. |
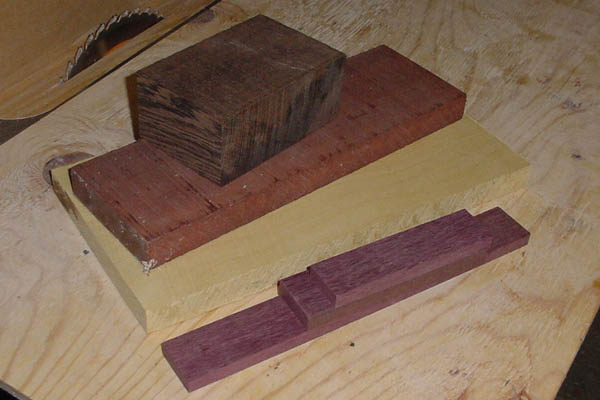 |
Materials Luckily, I was able to find enough of all the woods I wanted to use. Some of it was leftovers from other projects, but this'll put them to good use. Here is some wenge, bloodwood, yellowheart, and purpleheart. |
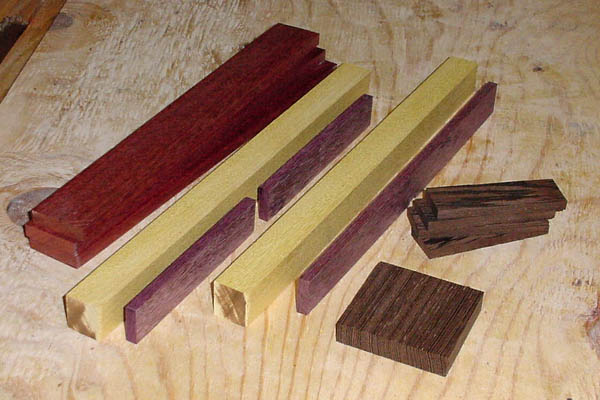 |
Preparing the Stock I ripped the stock to all the thicknesses that I'll need. |
 |
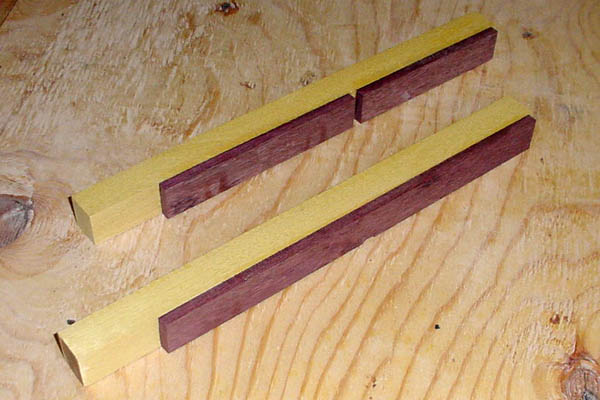
Laminating the pieces for the ring with
the ovals The thinner purpleheart layer will form the ovals and the thick yellowheart will be the background. |
 |
Ready for cutting The laminating is complete. A little planning allowed me to use the scrap purpleheart strips. I'll have just enough to get the number of segments needed. (3 out of the top one and 4 out of the bottom.) |
 |
Cutting I almost forgot to take a picture. This is the last piece of the oval section just after being cut. The picture shows my setup. Not pretty, but it works. I make test cuts on some scrap pine to get the saw adjusted precisely before I started cutting on the real thing. The cuts have to be perfect for the ovals to come out right. |
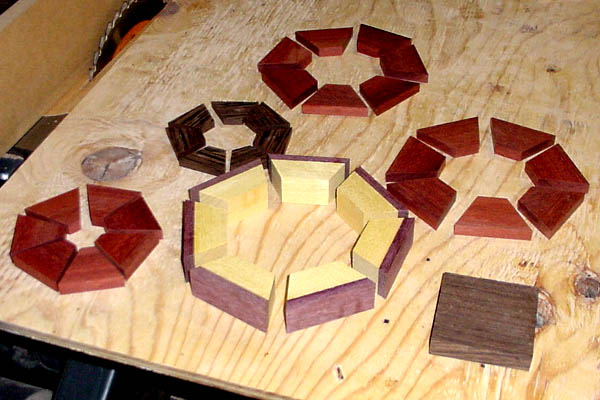 |
All pieces cut This shows all of the pieces cut and laid out nicely for the picture. I usually start gluing before I get all the pieces cut, but it's easier to show this way. |
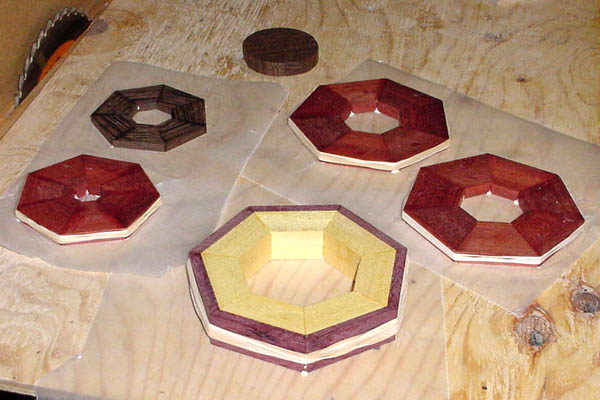 |
Gluing the rings Here all the rings are glued and clamped with rubber bands. |
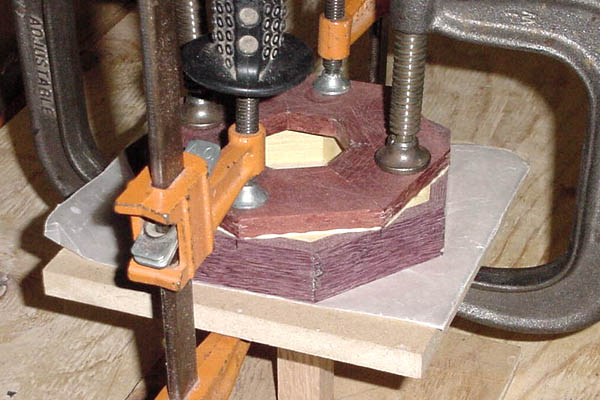 |
Stacking the rings The rings are centered and glued together to form the blank |
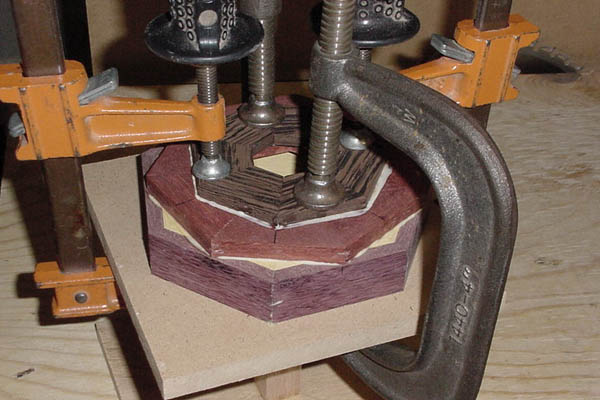 |
More stacking Normally, on most open bowls this process would continue until all of the rings are stacked. Since the centering must be perfect on the layer with the ovals I'll turn this bowl in two sections leaving the critical "oval" layer on the outside of one section. This will allow for perfect centering and help in the hollowing process. |
 |
The blanks Here are the two sections completely glued. The bottom layer (on the right) has a scrap block glued to the bottom and a faceplate attached, but I'll start turning the top section first (the one on the left). |
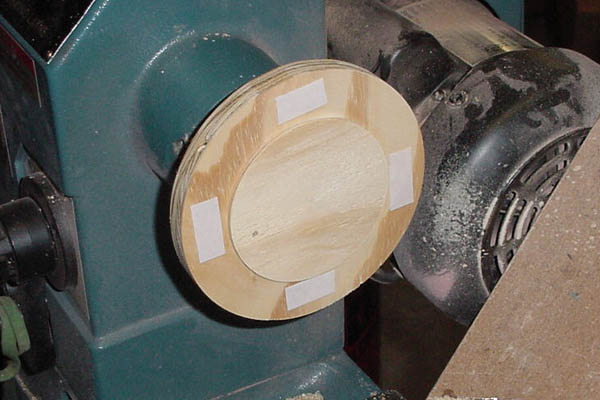 |
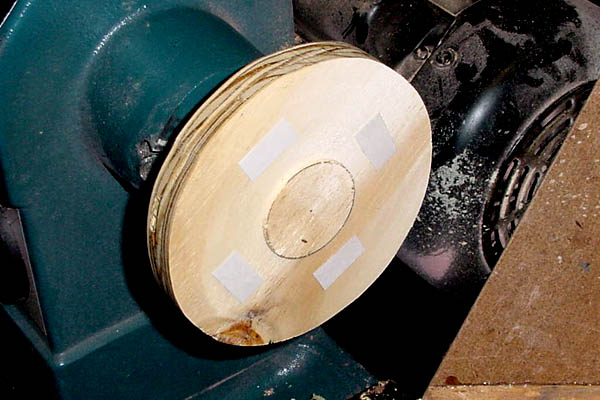
Making an auxilliary faceplate A scrap piece of plywood is mounted to the faceplate. I turned a short spiggot on the plywood just large enough for the "oval" ring to fit over with a snug fit. This is not to hold the blank, but it will insure that the ring will be perfectly centered and won't slip out of place. I put pieces of double stick tape on the faceplate to actually hold the blank. |
 |
Mounting the first section This shows the top section mounted and ready to turn. |
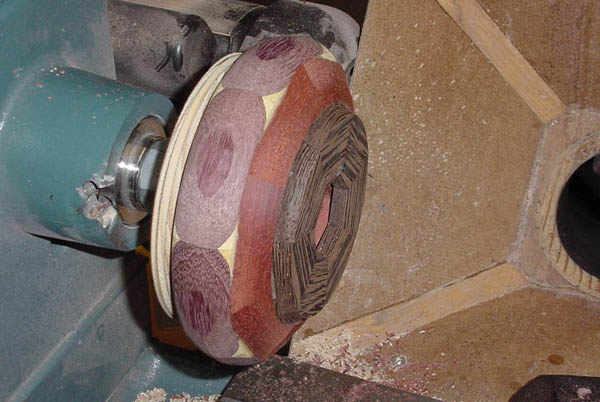 |
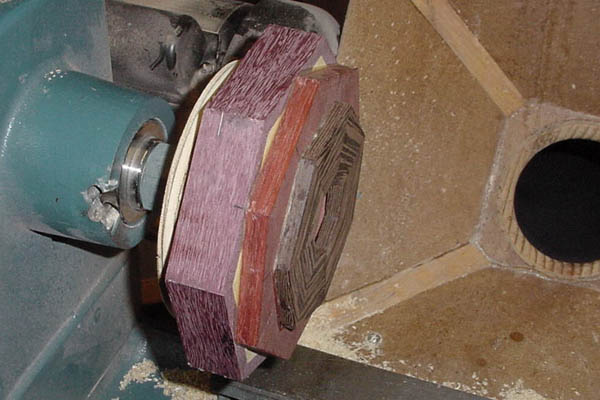
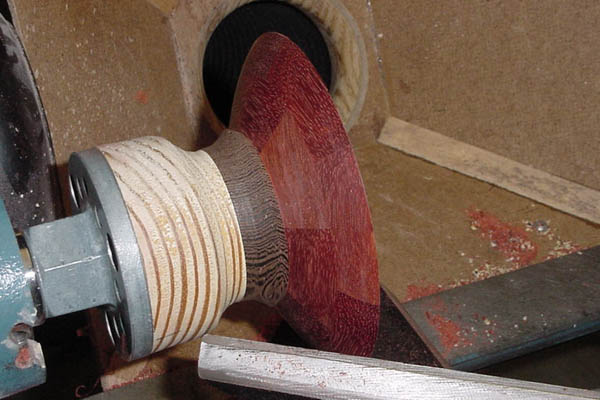
Turning While the blank is being roughed out the ovals begin to form. |
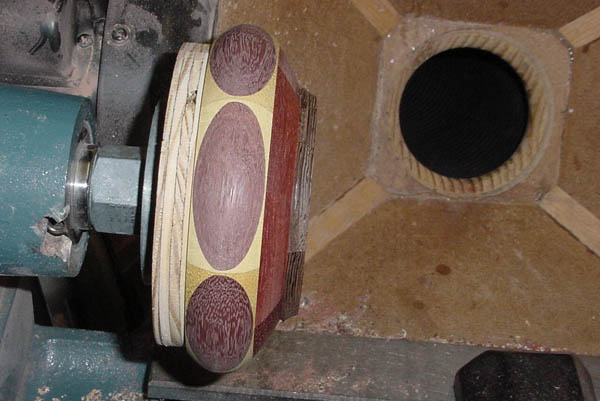 |
Getting the ovals right I go ahead and shape the bowl using the ovals as a guide when to stop. I hold off on shaping the rim at this point, because I'll need that area for holding the piece when I turn it around to do the inside. I did go ahead and round out the center of the rim and true up the face for the next step. |
 |
Another auxilliary faceplate This could have been the first auxilliary faceplate with the spiggot turned smaller to fit the hole in the rim just turned. This one was just made from another piece of scrap. More pieces of tape will hold the blank. |
 |
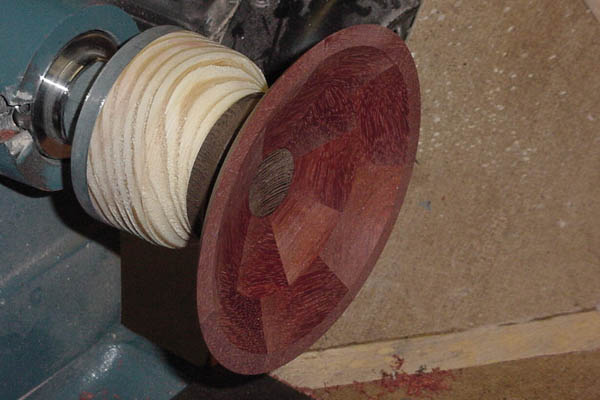
Reversing the Blank The blank is removed from the other aux. faceplate and remounted in reverse to this one so that the inside can be turned. |
 |
Turning the inside The inside is turned to final thickness with a tad extra left on where the two sections will be glued together. This will finish up the hollowing for this section except for the joint where the sections are glued together. I went ahead and sanded the inside at this time. |
 |
Mounting the bottom section The other section doesn't have to be centered as precisely as the section with the "oval" layer, so I can start turning it as I have it mounted already. |
 |
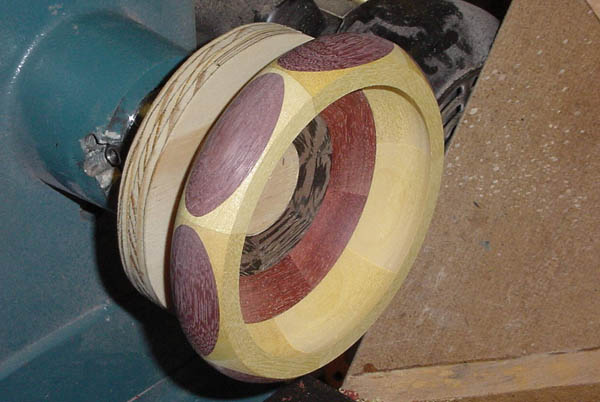
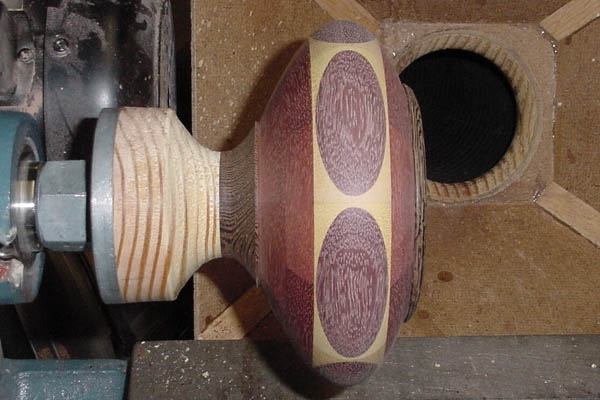
Turning the outside I shaped the outside to near final dimensions except for the base, which I wanted to have wider for more support during the turning process. I did go ahead and get the top close to the final diameter. I stopped the lathe frequently and matched the top section to the bottom so that I could get the diameter and curvature just right. |
 |
Turning the inside I turned the inside to match the outside. |
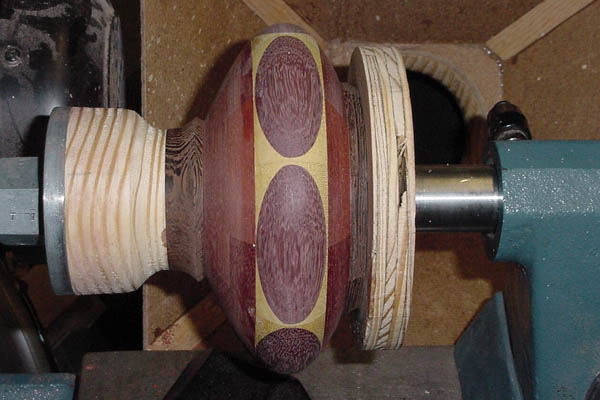 |
Putting the two sections together Leaving the bottom section on the lathe and with the top section still attached to the aux. faceplate I glued the two sections together being careful to line the joints up to match the alternate layer on the opposite section. The tailstock provides a nice clamp for the two sections, I just have to make sure that the two sections remain on center until the glue sets. |
 |
Clean up the glue joint I removed the aux. faceplate from the rim and cleaned up the transition between the two sections, so that the curve flowed smoothly and there is no distinction between the two sections. |
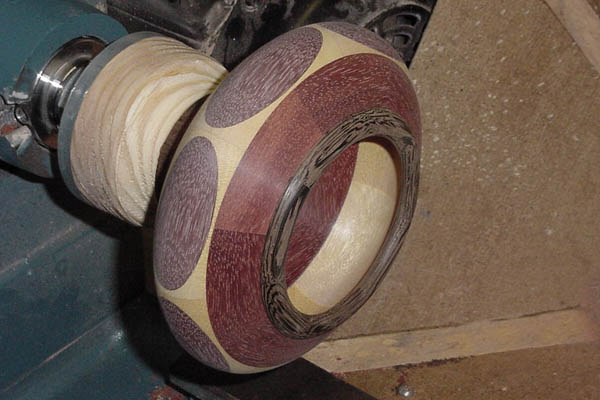 |
Turning the rim Here the rim is turned to the final shape, and the joint between the two glued sections is cleaned up on the inside. |
 |
Turning the base Well, I can't really get to the base very well, but this shows where I shaped it to very near the final shape. Sanding is completed at this point on all parts except for the base. |
 |
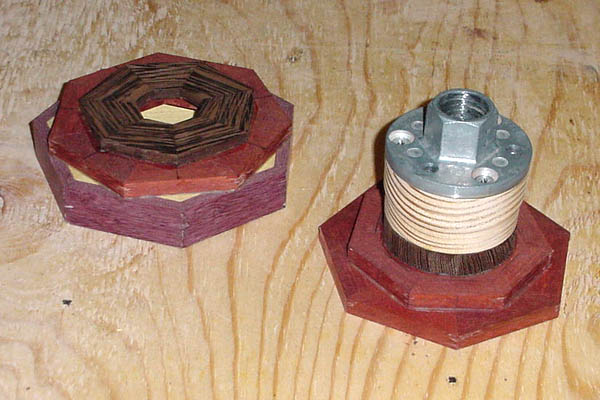
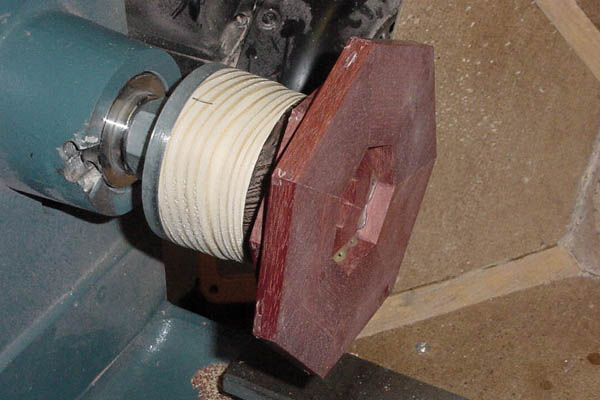
Getting ready to finish the bottom Now that I have put all this effort into this project and it has turned out so well to this point I surely don't want to have the bowl fly off the lathe and bounce across the shop floor. So, I'll put a little extra effort into holding the bowl, since I'm doing this without the use of a chuck. I make a sort of jam chuck by turning a shallow spiggot on the scrap wood to press fit inside the rim, and I drill a hole for a bolt to go through the center. |
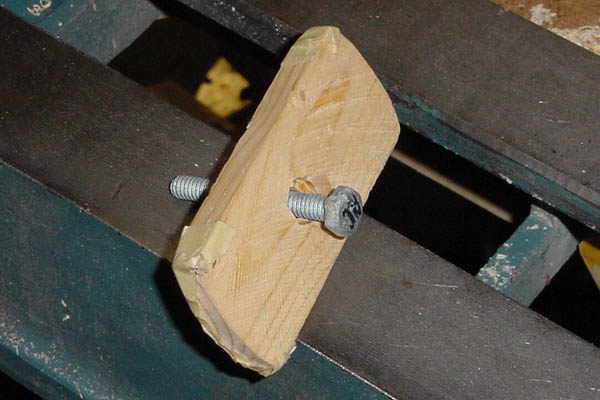 |
Making the cleat Actually, I had this one already made. I have used it once or twice before, so I didn't want to make another one. It's just a piece of scrap wood rounded and sanded with some tape on it to cushion the area that will be against the bowl. A hole is drilled in the center and countersunk to hold a long bolt. |
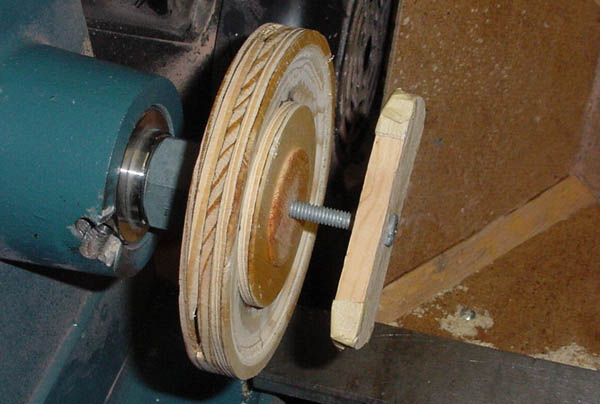 |
Attaching the cleat I did this with the faceplate off the lathe. The picture just shows how the cleat will be oriented once it's inside the bowl. The bowl is slipped over the cleat and a nut is tightened onto the bolt that protrudes through the backside of the faceplate. |
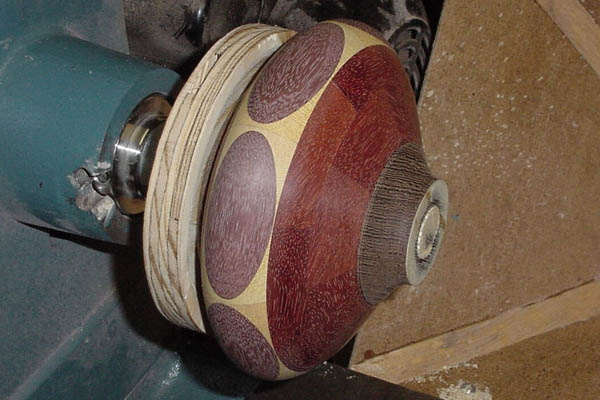 |
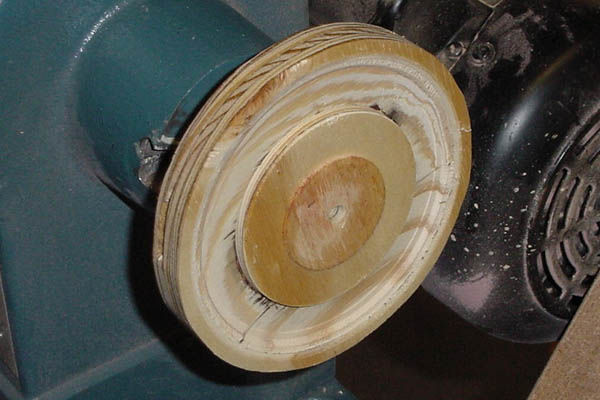
Mounting the bowl Here is the bowl mounted on the reinforced jam chuck, or whatever you want to call it. It is actually sturdy enough for some fairly heavy turning, but there's none of that left to do. |
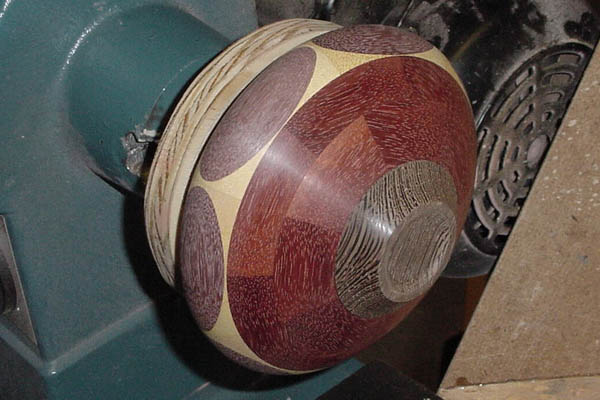 |
Turning the bottom Now the bottom can be turned to the final shape and sanded. This completes the bowl except for the finish. |
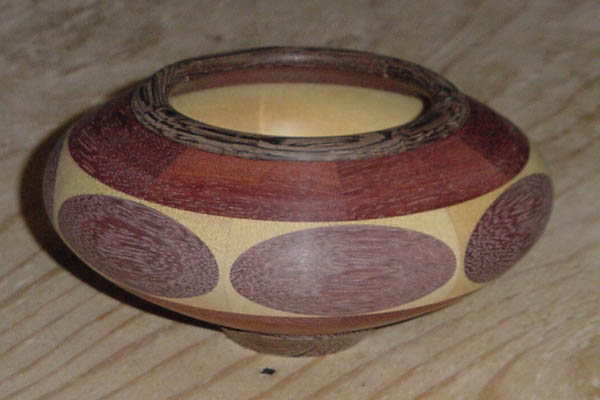 |
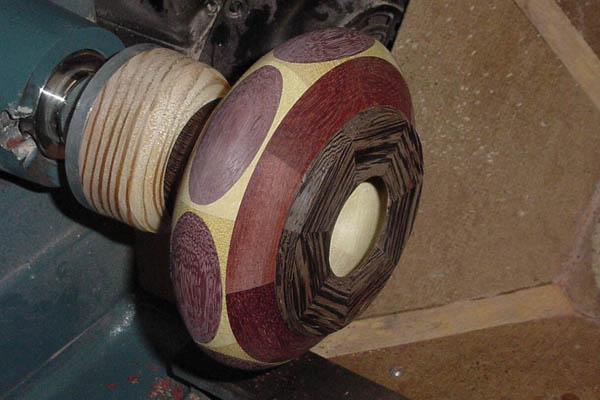
Turning completed Here's a view of the freshly turned bowl. All that's left is a few coats of wipe on poly. |